One of the challenges 4QTRS has had was determining how to best use the “Title” field in a given SharePoint list. Many lists, such as “Tasks” can use “Title” very naturally, using the title to give a few words to describe the item; i.e. “Run Server Updates.” But, other titles don’t make a lot of sense. “Last Name” is a field that can be adapted for the title field, indeed, the contact list changes the title field display name to “Last Name” for readability.
Consider a simple in/out log. The list leverages the already existing “Created By” field to determine who records in/out status, as well as the existing “Created” date/time field to log the in/out change. In this case, having a person enter anything into the “Title” field would be superfluous and open the process up to errors. So, we’re going to have the form automatically populate the title field and hide it from the user.
Start by opening up InfoPath 2010 and creating a new SharePoint List Form.
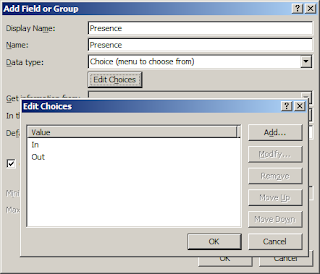
After authenticating to the site, and entering “InOutBoard” as the new list name, we see the default InfoPath form. Add a field called “Presence” and change the choices “In” and “Out” only.
Next, we will simplify the form to an easy two-button layout using the InfoPath designer. Our new buttons will each have a rule that runs on click that will handle all the work for us, including making sense of the otherwise useless title field.
Start by wiping the form, and creating a new centered layout section. Place a simple table within the layout and add two buttons; one each in the left and right cells. Change the buttons to read “In” and “Out” and delete the remaining table rows. Your form should look like this:
Now, we need to add four rules to the In button to complete the data entry.
- Set a field’s value: Presence = “In”
- Set a field’s value: Title = concat(userName(), " In at ", now())
- Submit using data connection
- Close this form
Configure a similar set of rules for the Out button, changing the two occurrences of the word “In” to “Out” and publish the form.
Click the Add new item link bring up the new form. We can click either button to enter an in/out log item into the list. Most importantly, the title field populates with useful information; “etherdragon In at 2010-03-24T11:25:39”
Improving the form further by changing the simple buttons to image buttons. Here is my finalized form using two simple image buttons.


